How To Install A Ford Explorer Intercooler

Installing an intercooler in your Ford Explorer can significantly enhance its performance, especially if you have other modifications, like an intake, already installed. The intercooler helps to cool the air compressed by the turbocharger, increasing its density and improving combustion efficiency. This guide will take you through the steps to install an intercooler in your Ford Explorer, covering necessary tools, preparation, and detailed installation instructions.
Table of Contents
Instructions
Tools
- 6mm, 7mm, 8mm, 10mm, and 13mm Sockets
- Painter's Tape
- Thread Seal Tape
- Torx 30
- 3/4" Wrench
- Rivets (Some Vehicles)
- Trim Removal Tool
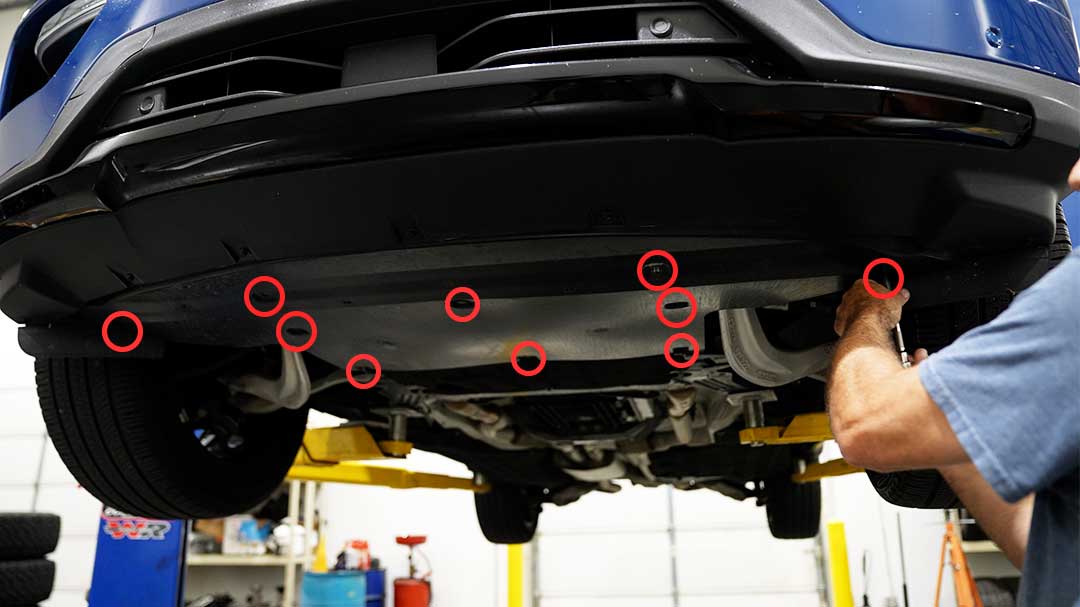
Step 1: Removing The Bumper
- Lift and support your vehicle with a jack and jack stands. Or you can use a car lift.
- Remove the fasteners for the belly pan.
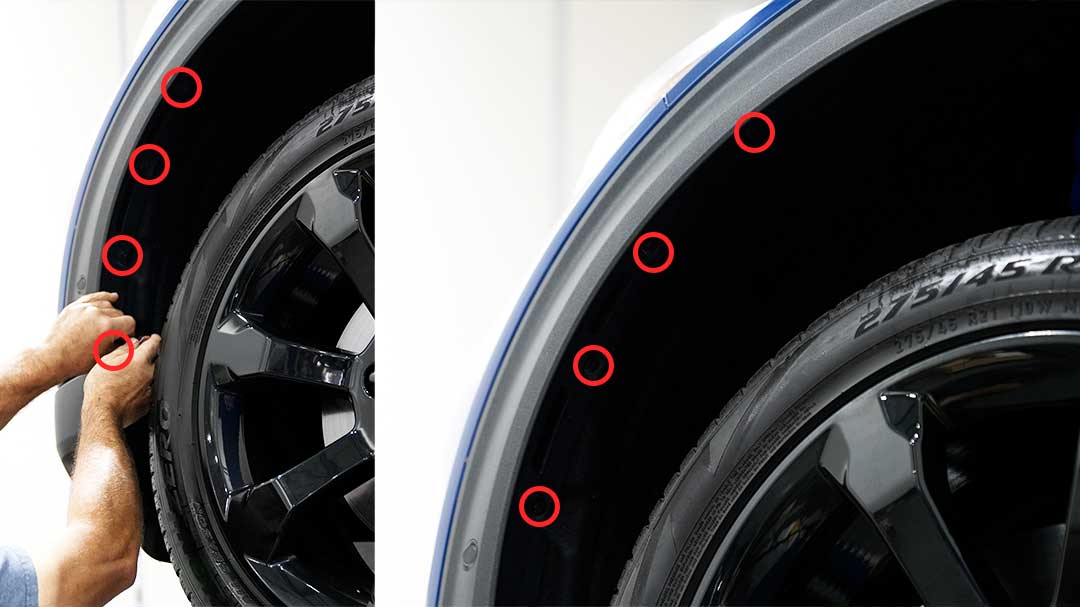
- Then work your way to each wheel well and begin removing the fasteners for the fender flare, so that you can get to the bumper cover.
- To allow for additional space in the wheel well area remove the front two wheels.
- Once you have all the push pins and fasteners removed you can pull back the well liner and outer trim piece.
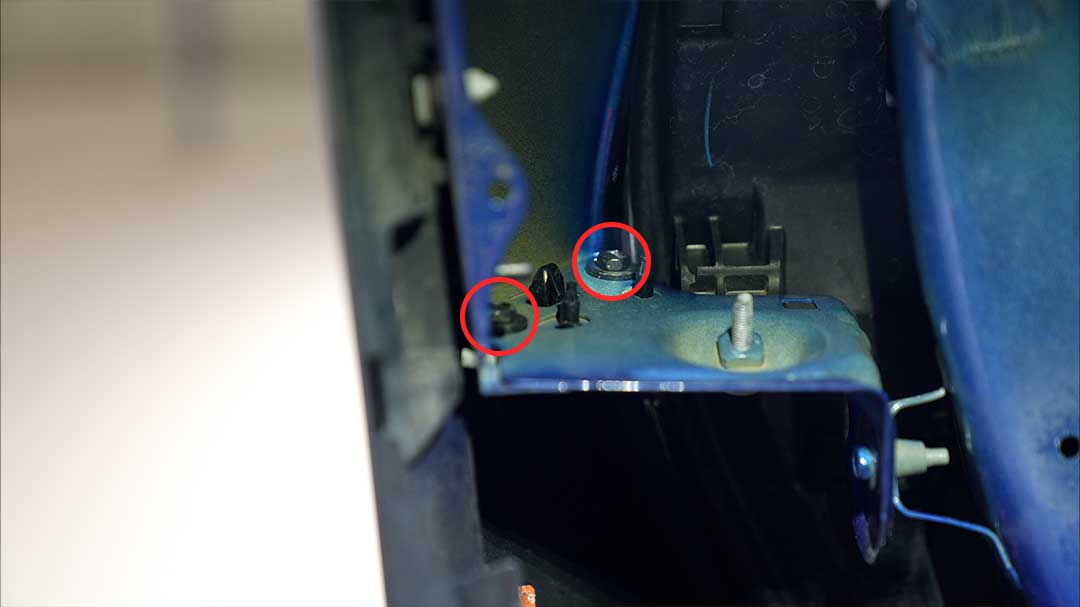
- Disconnect the parking sensor.
- Before removing the bumper cover you will need to diconnect the rest of the connectors.
- Then proceed to remove the two bolts that hold the bumper tabs in place.
- Proceed to opposite side and repeat the preceeding steps.
- Disconnect the windshield washer resevoir line
- Remove the four bolts that run along the top of the front fascia as well the hood latch cable.
- Remove your front bumper using your trim removal tools and painters tape to make sure you don't scratch any surfaces.


Step 2: Removing The Headlights
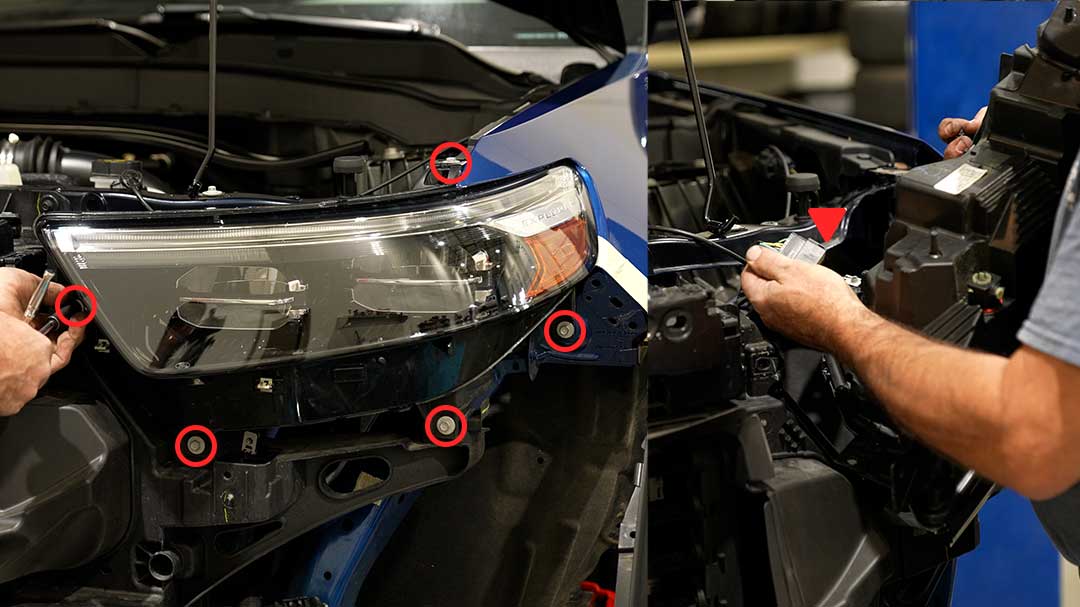
- Remove the series of bolts that are holding the headlights in place.
- Remove headlights and disconnect the fixture from your Explorer.
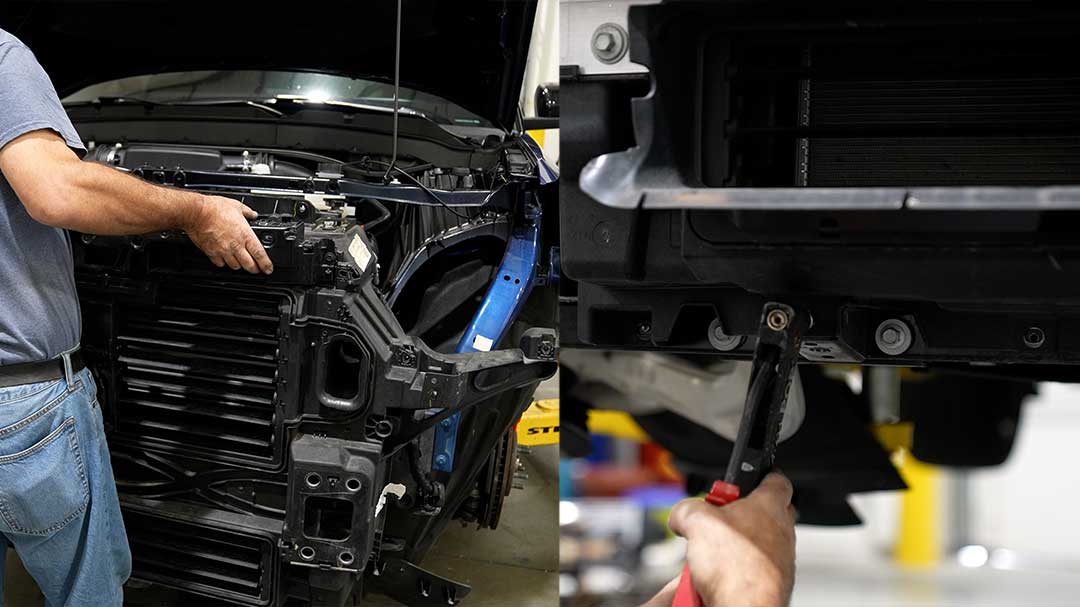
Step 3: Removing The Stock Intercooler
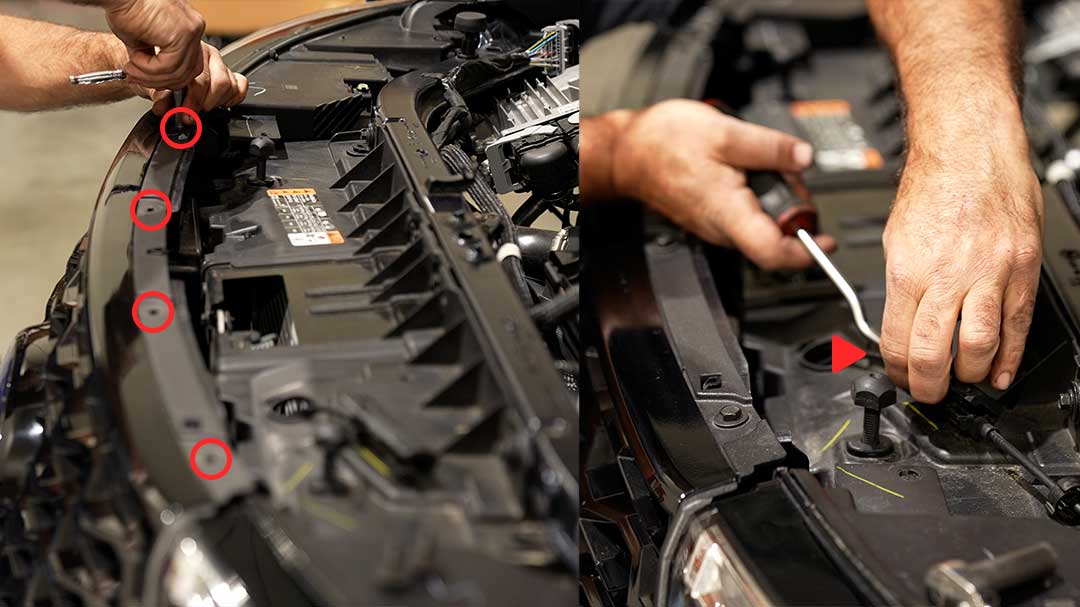
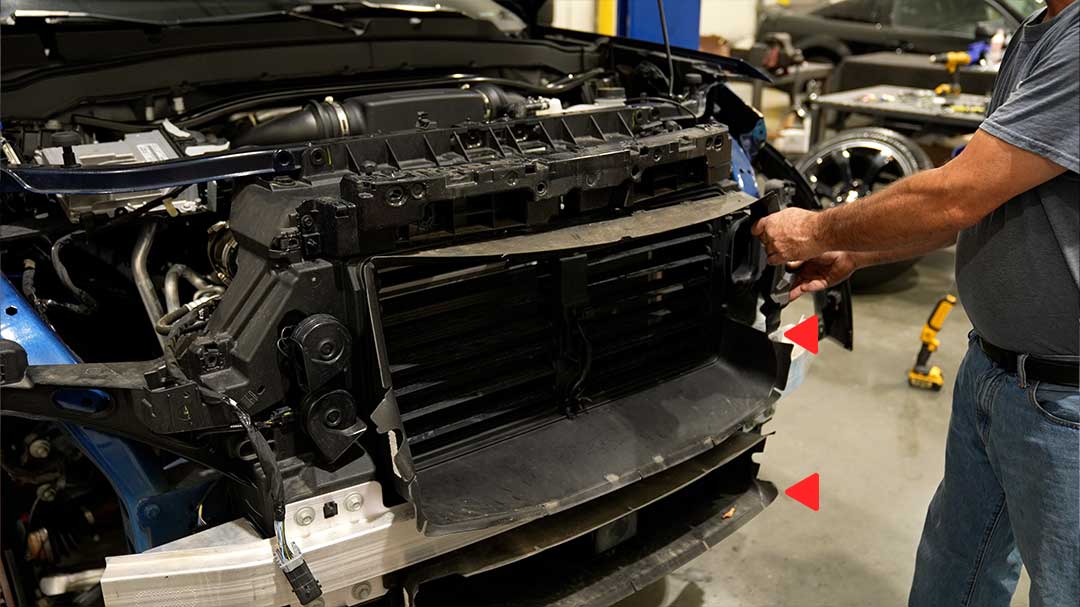
- Remove the hardware holding the header panel in place along the top.
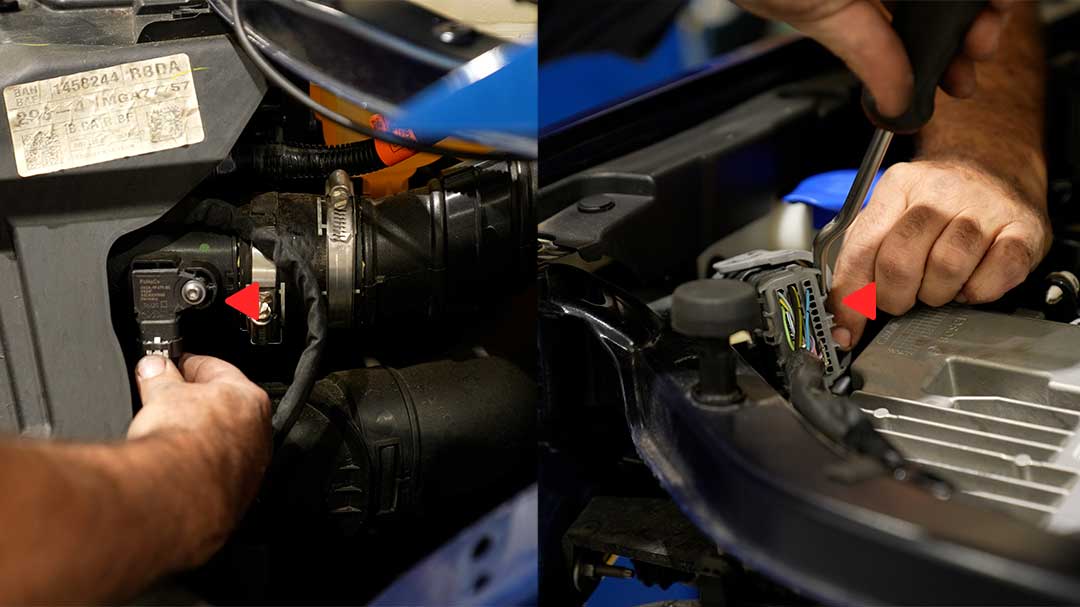
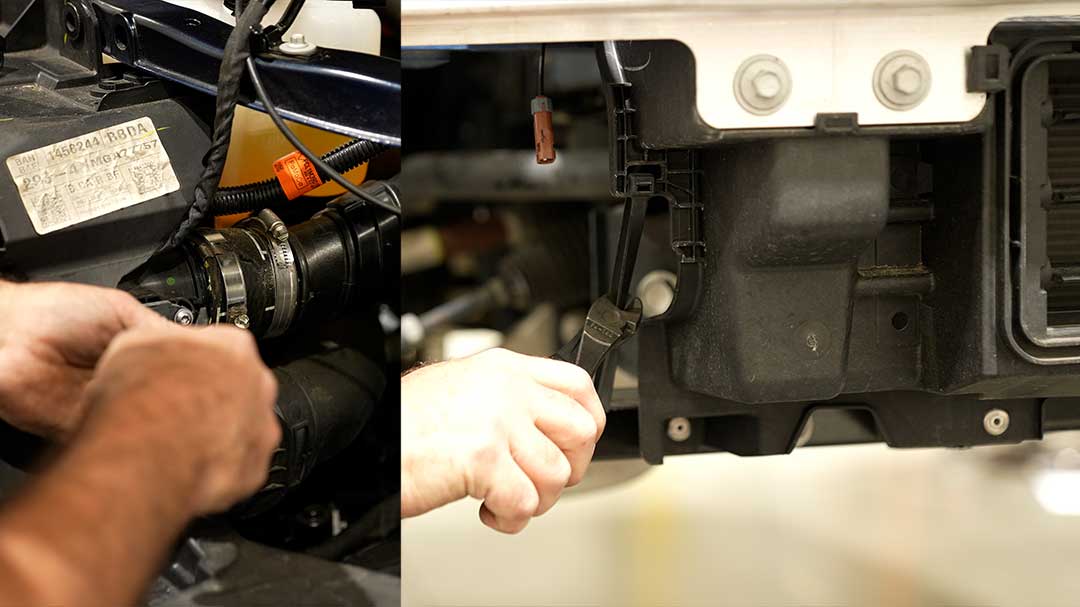
- Start disconnecting the intercooler hose by loosening the clamps and sensor.
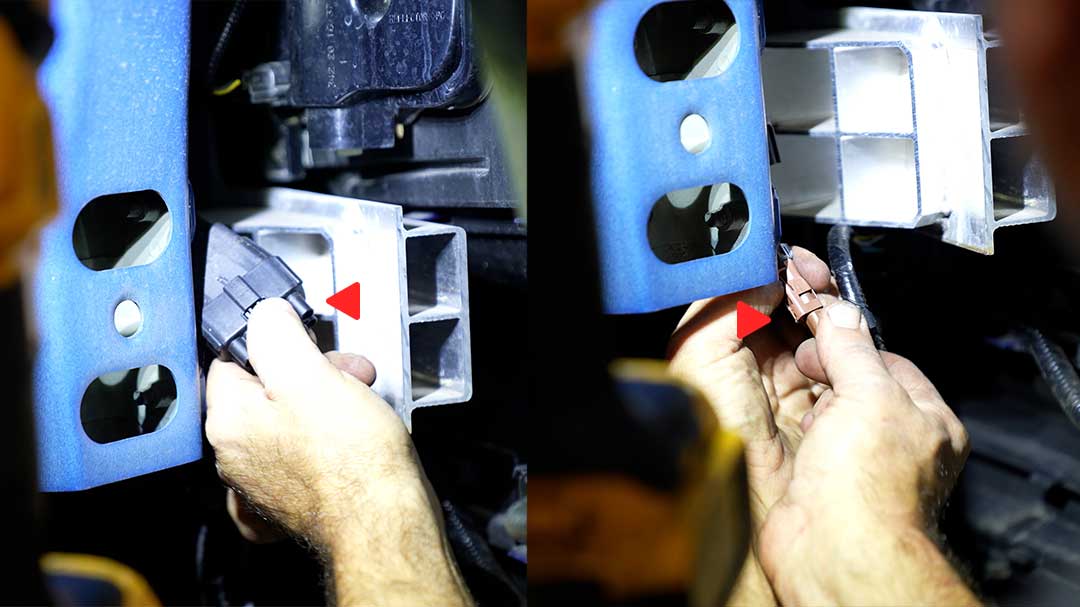
- There is a larger electrical connector on the passenger side that will need to be disconnected.
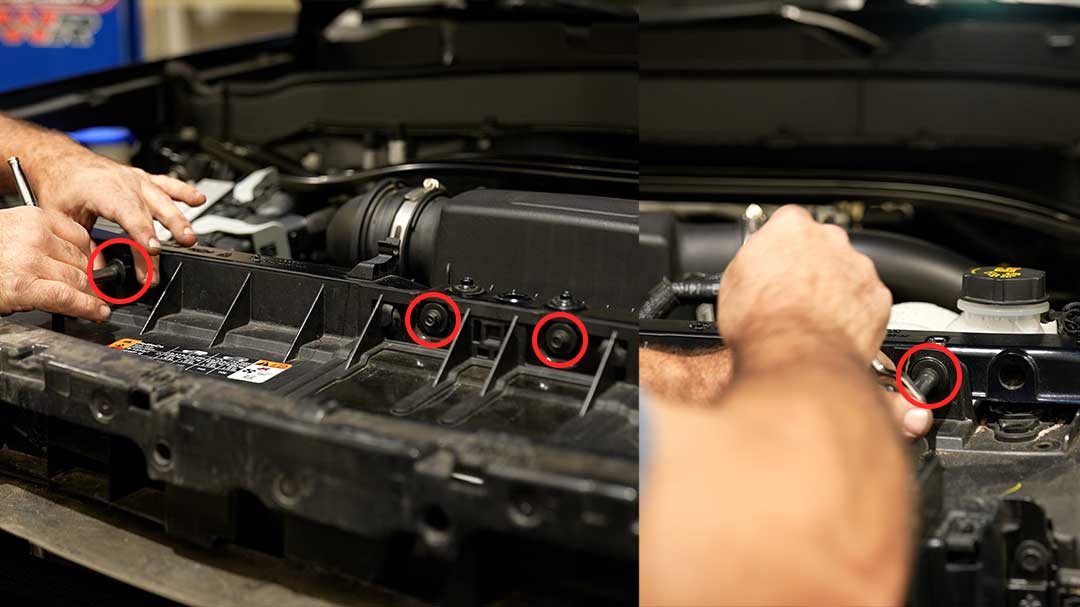
- Remove the upper and lower intercooler shrouds.
- Remove the hoses from the intercooler and the zip ties on either side at the bottom holding the header panel to the car.
- If your Explorer has rivets along the bottom of the header panel begin to tap and drill them out for removal.
- Remove the front crash bar.
- Using a screw driver, loosen the header panel at the attachment points on top - once out, the header panel should be easy to remove.
- The intercooler is ready to be removed. Make sure to disconnect all lines and bolts on either side of the intercooler and carefully wedge it loose.


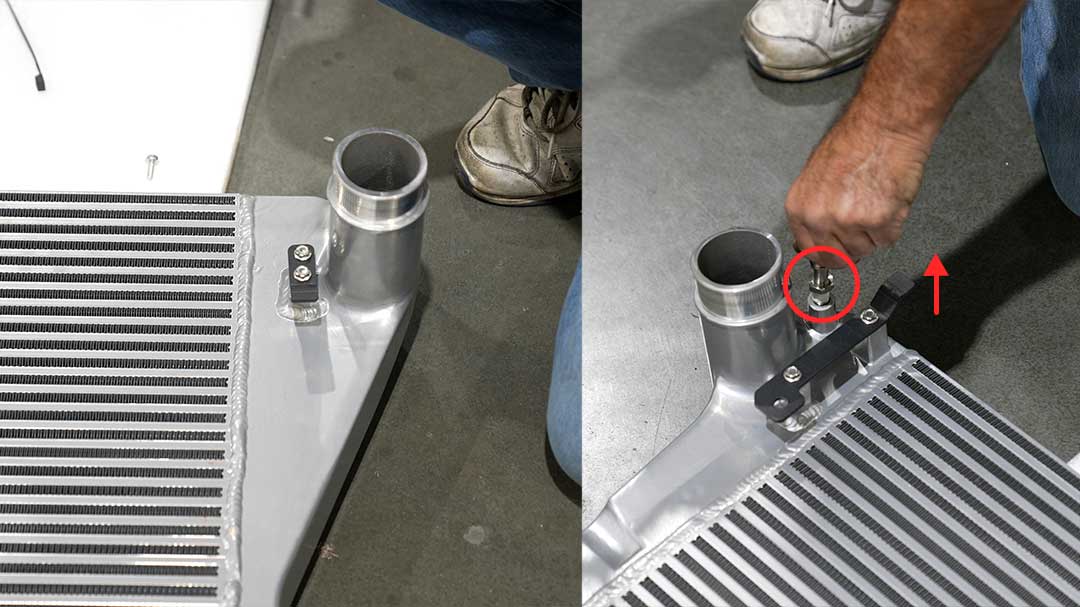
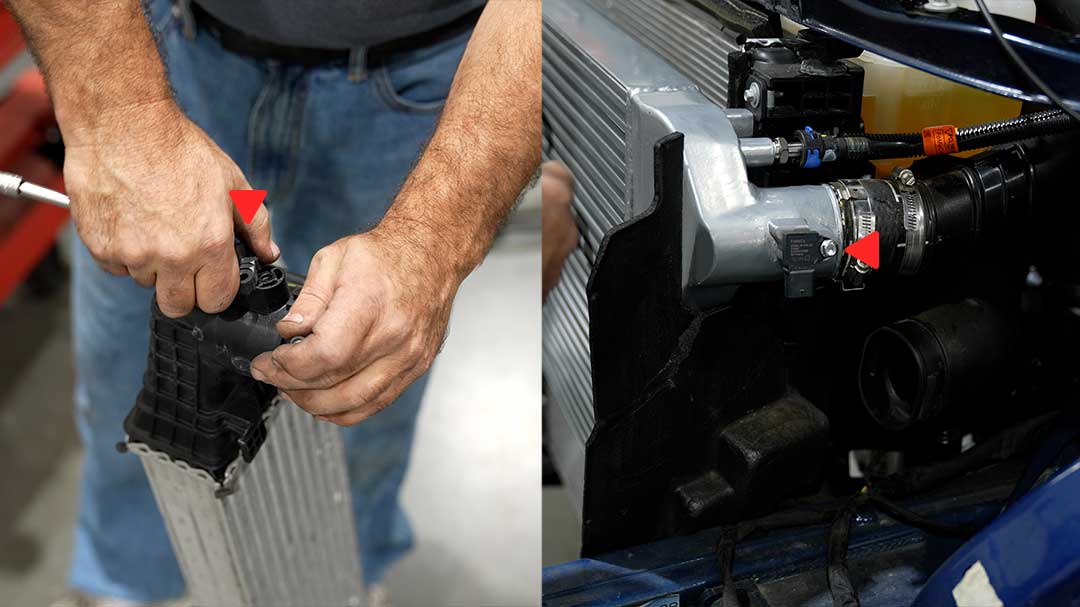
Step 4: Preparing The New Intercooler
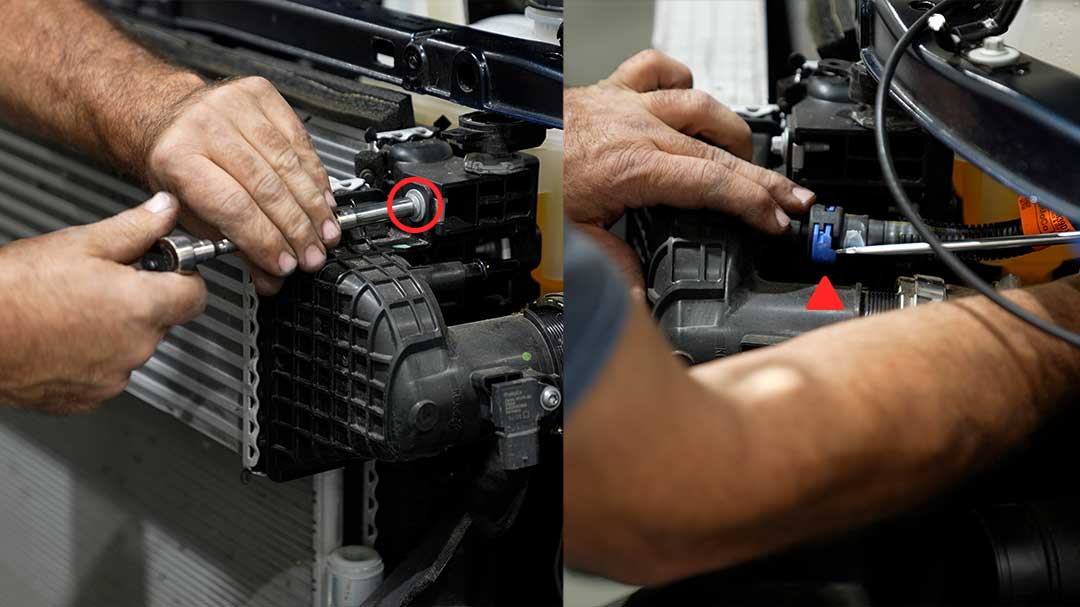
- Locate the sensor on the new intercooler and carefully install the brackets into place. When installing the hardware make sure that the tab faces the inside of the car where the inlet and outlet are.
- Wrap teflon tape around the fitting before you screw it into the new intercooler - screw and tighten the fitting into place on your new intercooler.
Step 5: Installing The New Intercooler
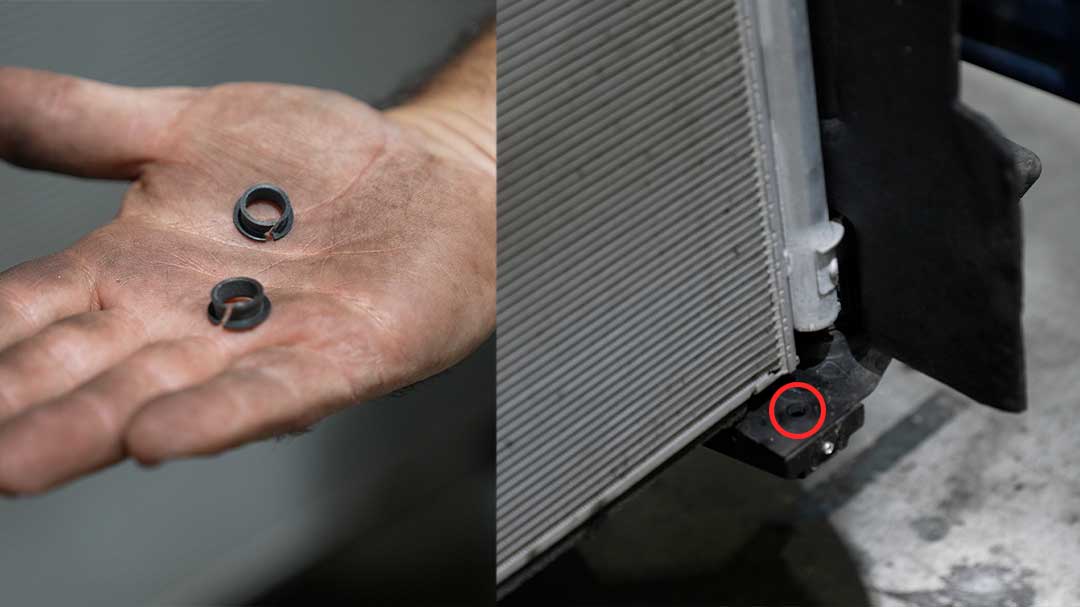
- Included in this kit are a set of bushings that are to be placed at the bottom mounting points that the intercooler brackets sit in - go ahead and place these.
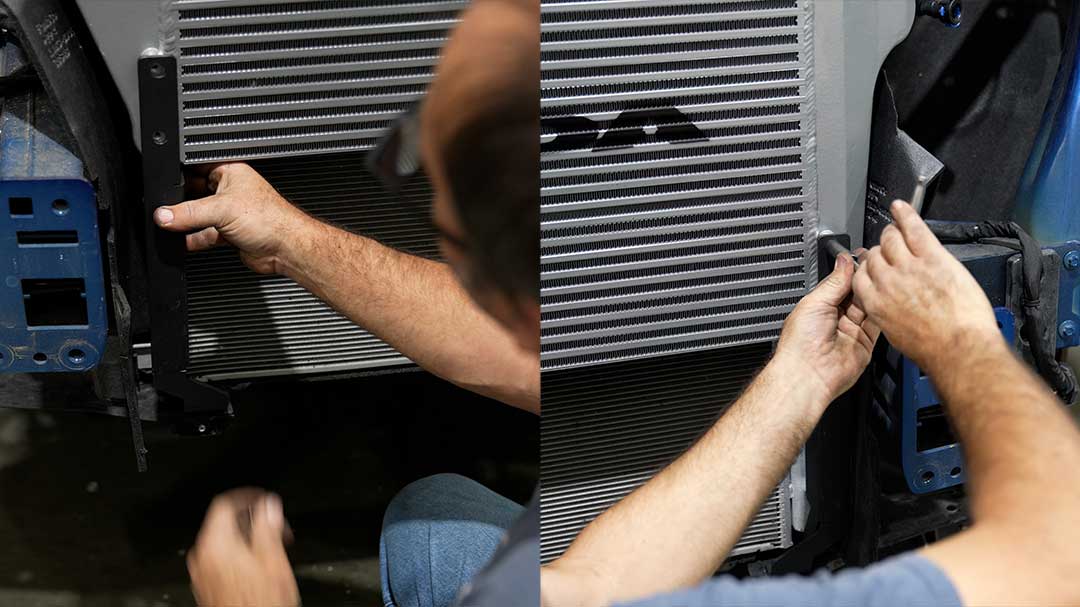
- Put the new intercooler into place and install the provided brackets.
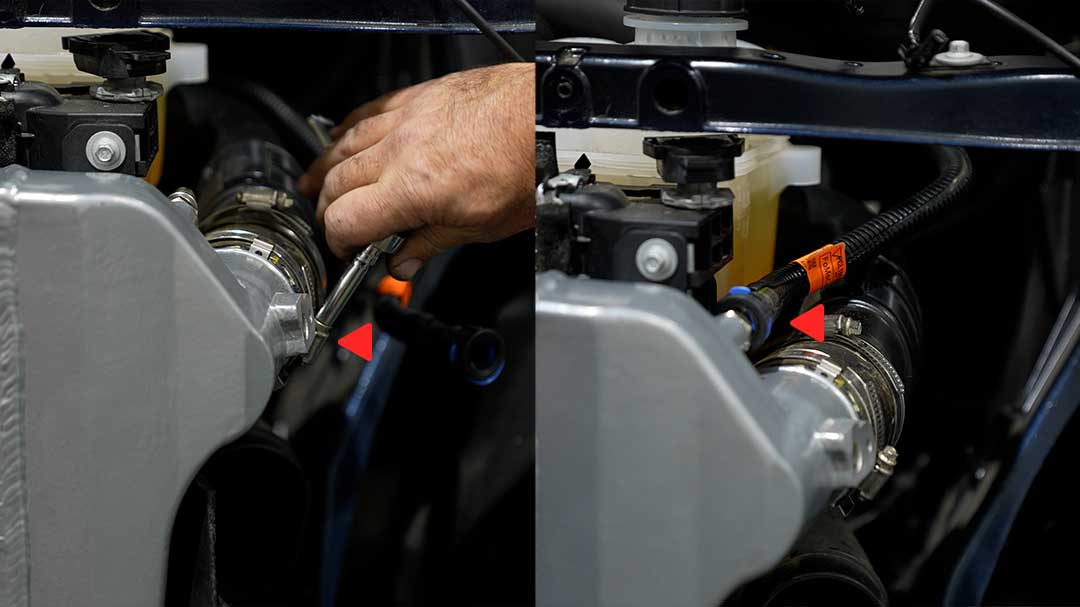
- Install the inlet and outlet on either side and tighten down the clamps.
- Reinstall any other lines for your intercooler at this time.
- Relocate the temperature sensor from the factory intercooler to the new intercooler.
Step 6: Reassemble the vehicle's front grill, belly panels, and fascia in reverse order.
- Note: If you removed your factory rivets in the disassembly process, then new rivets will need to be installed.

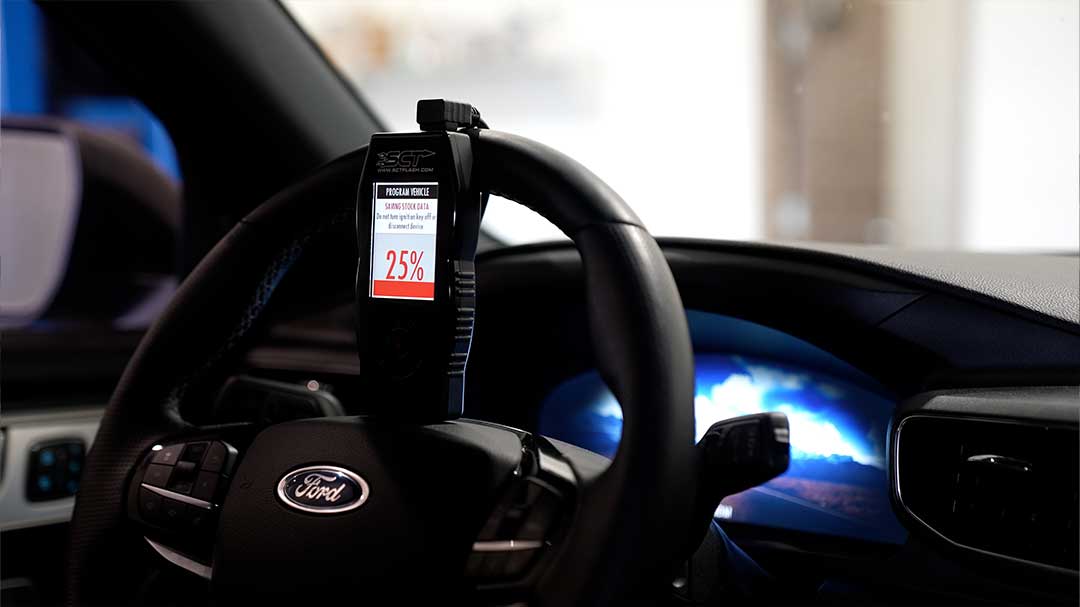
Step 7: Set up your tuning device and load your tune. (Optional)
- Purchase your tuning device with tune here.
- Follow the directions on the device to install your tune.